Hello, it’s a tutorial of the M-VAVE Chocolate Bluetooth Midi controller. It’s divided into three parts. The first is something like a Manual of the equipment. The second is related to ideas to configure it with the Mod Dwarf and other Mod devices. The last part is some personal considerations.
A quick manual
M-VAVE Chocolate is a cheap MIDI controller. With it, it’s possible to send MIDI messages by USB, by MIDI TRS and by Bluetooth (but apparently the company doesn’t licensed the Bluetooth technology).
The equipment works by USB 5v (300mA) or by your battery (2,5 hours to full charge for 12 hours of usage, according to its manual).
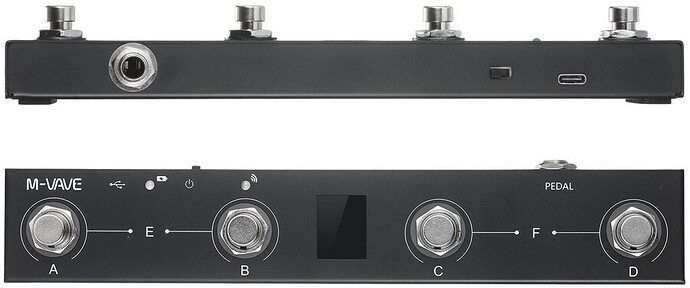
The equipment contains four footswitches, a two seven-segments display, an expression pedal/midi trs input, a USB type C input and an on/off switch. It also has two leds, one red/green to informs when the battery is fully charged and one blue to inform if the device is connected with another by Bluetooth device.
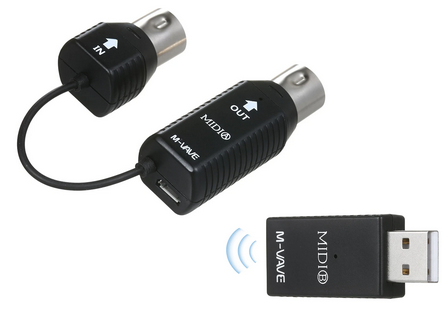
Side note. You can use it with bluetooth on Dwarf with the M-VAVE ms1 mini dongle. It has two parts: A related to connect into MIDI equipment and a USB stick. You can just ignore the first part and connect the second one directly into your Mod Dwarf.
M-VAVE Chocolate is an interesting equipment. It contains a lot of modes, where you can select between them by the app “CubeSuite”.
For smartphones, the CubeSuite app is present on the Apple store. But it’s also possible to download the Android app scanning the QR code printed below the device (it contains the http://www.cuvave.com/appdownload link).
Surprisingly, the CubeSuite app isn’t present on the Google Play Store and you need to download the apk and install it. Very strange and suspect…
For Mac and Windows, it’s possible to download it from the site http://www.cuvave.com/appdownload or http://www.cuvave.com/xznr.3
Modes
The modes are quickly presented by a small description. I transcribed them (quotes citation) and tried to describe how they works.
Program Change A
“A to D keys are used to send PC code, E and F keys are turned groups. A total of 8 groups of 32 timbre. The PC number is displayed as an alphabetic plus number”
- 32 PC codes are divided into 8 groups of 4 PC codes.
- The first group contains the first four PC codes (00 to 03)
- The second group contains the PC codes 04 to 07
- The last group contains the PC codes 28 to 31
- When a footswitch is pressed, its corresponding PC MIDI message is sent.
Eg: If we are in the first PC group, if I press the C footswitch, then is sent “PC 02” MIDI message.
- It’s possible to navigate between groups pressing F (C+D) to go to the next group and E (A+B)
- Note:
pressing F (C+D) is sent CC Control Function 3 Value 5
pressing E (A+B) is sent CC Control Function 2 Value 5
- Note:
Program Change B
“A to D keys are used to send PC code, E and F keys for the flip group. A total of 128 timbre. The way to display PC number is a pure number”
- Similar of the previous mode, but the 128 PC possible values are splited into 32 groups of 4 PC codes
Touch Screen (Android)
“A–Swipe up B–Swipe down C–Swipe left D–swipe right”
- It really simulates swipe movements. Useful for change a partiture page if you connect the M-VAVE Chocolate on your phone
- No midi signal is sent
Keyboard A
“A–Up B–Down C–Left D–Right”
- It sends the keyboard up/down/left/right commands. Probably useful for change a page from a PDF or similar if you connect the M-VAVE Chocolate on your phone
- No midi signal is sent
Keyboard B
“A–Page up B–Page down C–Space D–Enter”
- It sends the keyboard page up/page down/space/enter commands. Probably useful for change a page from a PDF or similar if you connect the M-VAVE Chocolate on your phone
- No midi signal is sent
MultiMedia keyboard
“A–Page up B–Page down C–Space D–Enter”
- Similar of the previous modes
- A - Go back to the last song
- B - Go to the next Song
- C - Lower the volume
- D - Turn up the volume
Manufacturer Control
“Control manufacturer’s equipment. Refer to manufacturer’s equipment instructions for details” (???)
- Control Change:
| Button | Action | Control Function | Value |
|---|---|---|---|
| A | on pressing (momentary on) | 20 | 127 |
| released | 20 | 0 | |
| B | on pressing (momentary on) | 21 | 127 |
| released | 21 | 0 | |
| C | on pressing (momentary on) | 22 | 127 |
| released | 22 | 0 | |
| D | on pressing (momentary on) | 23 | 127 |
| released | 23 | 0 | |
| E (A+B) | on pressing (momentary on) | 24 | 0 |
| released | 20 or 21 | 0 | |
| F (C+D) | on pressing (momentary on) | 25 | 0 |
| released | 22 or 23 | 0 |
- After releasing the combination buttons (E or F), a MIDI signal is sent based on the last button released.
Custom control
“Set up custom MIDI CC and some common MIDI”
- On the app, you can:
- select a MIDI channel between 1 and 16

- select what CC will be send in each button (A to D)
- select a MIDI channel between 1 and 16
- When I press a button of the CC mode, is presented a window, where is possible to:
- change the current mode:
- “Visual behavior” on:
On/Off - Press to change the CC value to 127, press again to change the CC value to 0, press again to change the value to 127… - “Visual behavior” off:
Momentary on (CC value to 127) when the footswitch is pressed and off (CC value to 0) after it is released
- “Visual behavior” on:
- select the control function that will be sent.
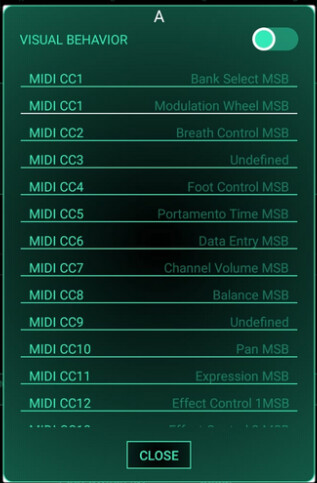
- It’s possible to select between 1 and 128
- Also, it’s possible to select the following modes
but when one of their is selected, the “Visual behavior” don’t change any behavior
- change the current mode:
- Isn’t possible to assign any command to E (A+B) and to F (C+D)
Video Model (sic)
“A–Quick astern B–Fast forward C–Play/pause D–Loop playback, need to use Chrome browser and install the extension, temporarily support YouTube, Bilibil”
- I tested it with the Youtube Android app and the A, B and C footswitches worked. D apparently doesn’t work.
- No midi signal is sent
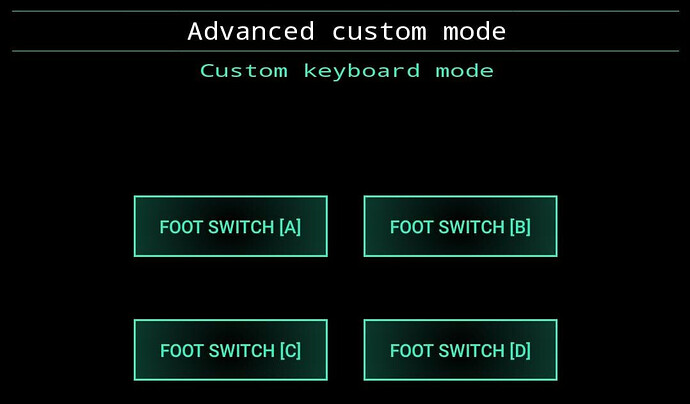
Advanced custom mode
“You can customize the way you use your pedals more flexibly”
- You can assign custom MIDI command(s) for A to D footswitches. EDIT: In a previous version there was an
Interfacebutton, I didn’t know for what it existed
- In this mode, you can change the footswitch mode and the MIDI messages that are sent. It’s possible to add more than one message to be sent.
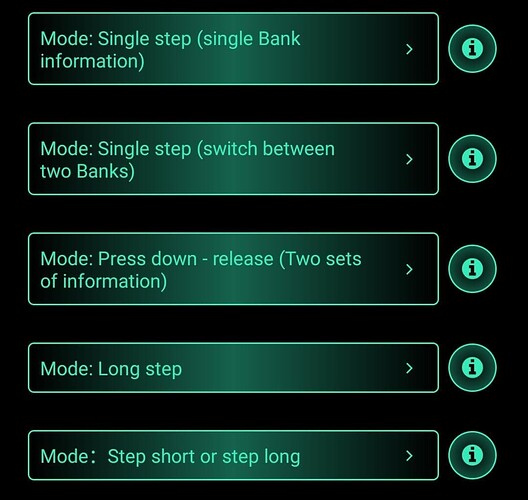
- For each button, you can define the “working mode” between them:
- Mode: Single step (single Bank information)
“Send an identical MIDI message or set of mid messages each time a foot pin is pressed and lifted”- The command is only sent after released the footswitch
- Mode: Single step (switch between two banks)
“You can set two banks of MIDI information, A and B. Each time you press the nail and lift it, the two banks of MIDI information will be sent in turn.”- The command is only sent after released the footswitch
- Mode: Press down - release (Two set of information)
“You can set two banks of MIDI information, A and B. Each time you press the foot pin to send the bank A message, lift the bank B message”- Pressing a footswitch sends a command
- Release a footswitch sends another command
- Mode: Long step
“When you step on a foot pin, the MIDI message of set of MIDI messages that you set will be sent at regular intervals. You can also press the on once to send the first of all MIDI messages”- In my tests, if I long press (about 2 seconds), then only the first midi command is sent. If I continue pressing, then all the midi messages will be sent at regular intervals.
- If I short press the footswitch, nothing happens.
- Mode: Step short or step long
“Send bank A message every time you step on A foot spike and lift it. Send bank B message when you step on a foot pin”- The command of bank A is only sent after released the footswitch
- Mode: Single step (single Bank information)
- After selecting the mode, you can customize/add MIDI messages for each button behaviour. For instance, if I select “Single step (switch between two banks)”, I can define the MIDI messages there will be sent after I press and release the footswitch and also define other MIDI messages there will be sent after I press and release the footswitch again.
Custom Keyboard Mode
You can set common keyboard keys
You can assign a computer key (from keyboard) for each footswitch. The key usables are A to Z, Arrows (up, down, left, right), Page UP, Page Down, Space, Enter.
EDIT: This last option is a new option that I just saw now on 2023. I’m not sure when it was added.
Usage with the Mod Dwarf
Live debug
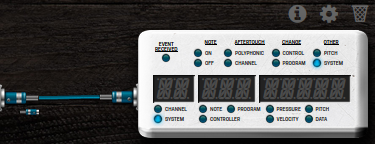
First tip: Download and connect the “MIDI display” plugin beta to check if you successfully configured the MIDI messages.
Usage like Mod Footswitch - Latching and Momentary on
If you want to use the equipment to turn on/off a plugin like the Mod Dwarf footswitch does, I recommend you to use the Custom Control, not the Advanced Custom Mode.
On the Cube Suite app
- Select the Custom Control;
- Press the button that corresponds a Footswitch;
- Change the
Visual Behaviourto:- off if you want to use as
Momentary on; - on if you want to use as
Latching; - if you what to use as “Momentary off”, select off (but an additional step is necessary);
- off if you want to use as
- Select a MIDI CC (preferably one that has not been used yet to avoid to use two footswitches for the same audio plugin)
On the Mod UI
- Go to the configuration of the effect

- Go to the configuration of the parameter that you will controls (probably is the first
ON/OFF)
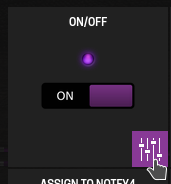
- Select MIDI and press Save
- And, finally, press the corresponding Chocolate footswitch that will control the audio plugin. In my case, I selected the Channel 16 and the “Midi CC#0”:

Usage like Mod Footswitch - Momentary off
If you want to use the footswitch like Momentary off, it is necessary to invert the MIDI signal. An alternative is using the Advanced Custom Mode, but I prefer to use the Custom Control plus control voltage instead:
I suppose that you selected off in the Visual Behavior in the Cube Suite app. If not, check the previous section to know how to do it.
On the MOD UI
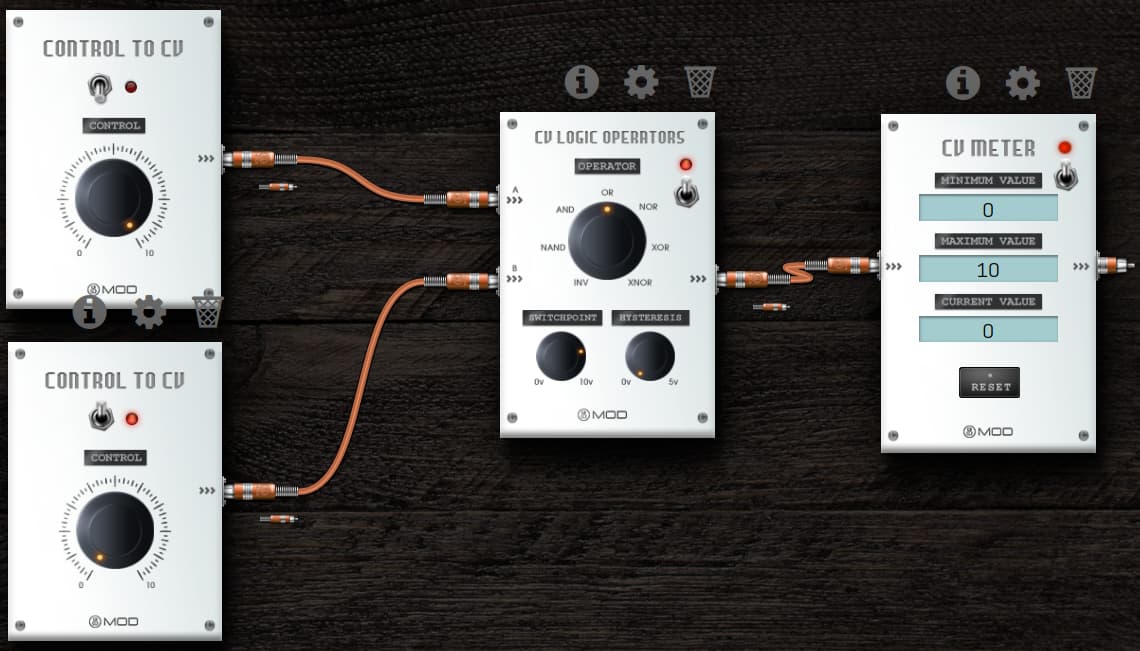
- Add a
Control to CVand aLogic Operators(maybe it’s necessary to install them); - Add also the
CV Meterfor debug purposes; - Connect them like the following:
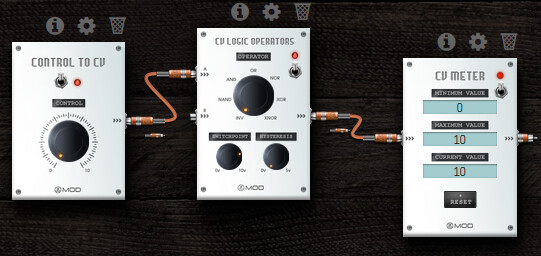
Note that theOperatorof theLogic Operatorsis inINV. Then, if the input is 0v, the output is 10v, and if the input is 10v, the output is 0v.
Check in theCV Meterthe applied value intoCurrent Valuedisplay. - Now, you need to assign a footswitch to the Control parameter of the Control to CV:
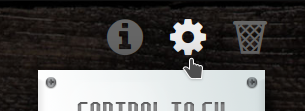
- Click in the Manage CV Ports button to enable it

- Click on the checkbox of the CV Logic operators
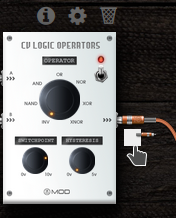
and rename it to an explicative text. In my case, I wrote “Chocolate B - Momentary off”
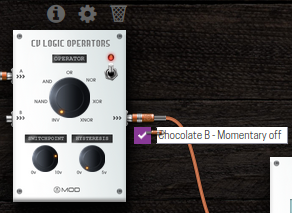
- On the settings of the parameter that you will control over the footswitch, select CV, select the CV with the name that you defined and press Save.
- Click in the Manage CV Ports button to enable it
Control an effect with the MIDI and the Mod Dwarf footswitch
Maybe you are thinking: “If at any moment I forgot/lost the MIDI Chocolate or even the battery discharged and I have only the Mod Dwarf… Is there any way to configure both the Mod Dwarf footswitch and Chocolate footswitch to turn on/off an effect?”
Yes! It’s possible:
You will need to use two Control to CV and the CV Logic Operators:
-
At the first Control to CV, you will
- move Control to 10v
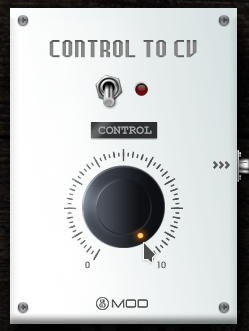
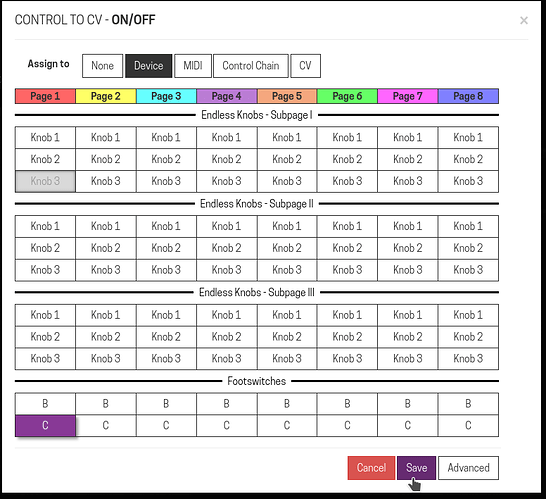
- assign the desired footswitch to ON/OFF
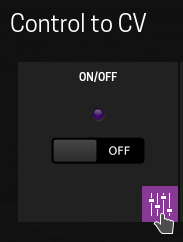
- Click on advanced

and add an identifiable name. In my case, as I’m controlling a Gain, then I will rename to Gain

- move Control to 10v
-
In the second Control to CV, you will configure like the presented in “Usage like Mod Footswitch - Momentary off”
-
In Logic Operators, you
- will connect the Control to CV to the inputs
- change the Mode to
OR - enable the CV output port and rename to some identifiable
-
Then, you will assign the output to the desired effect, just like as the previous section.
Warnings:
- Note that changing the Chocolate footswitch state doesn’t changes the Mod dwarf state
- Note that it is necessary that only one of the two footswitches is tuned on to turn on the audio plugin. As a consequence, if you turn on the Chocolate footswitch, the effect will be on, and you can’t disable it by the MOD Dwarf footswitch.
EDIT: An alternative to fix the second point is usingo XOR Mode instead of OR Mode. But noticed that we will still have the problem 1.. Thanks for Casanunda for this great information.
Custom routing
The previous cases are related to turning on / off a specific effect. Another usage is changing the audio routing. There are two special plugins that can be useful for creating custom routing and also receive visual feedback by a popup that appears on Dwarf when you press a Chocolate footswitch.
The first one is Tetr4-switch a plugin for turn on/off specific effects.
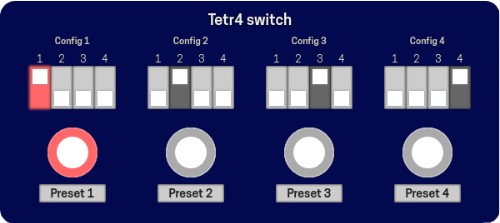
It’s a simpler alternative to snapshots, inspired by the real pedal switches, like Octa Switch and Pedrone Penta Switch. For more details, I recommend you see its specific topic.
The second one is Gossiper, a plugin that shows into Dwarf screen a popup message when you turn on/off one of its parameters.
With it, you can get some feedback when you are using the Chocolate. For more details, I recommend you see its specific topic.
Also, you can use your imagination and this following plugins for create pedalboards with spec requirements that you need.
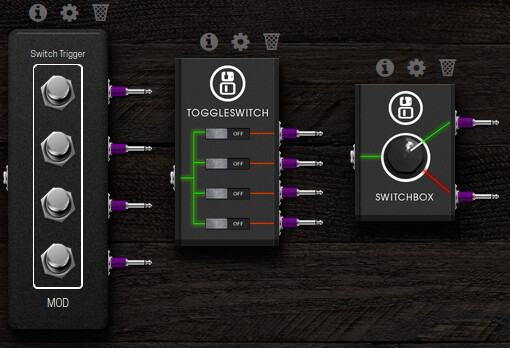
A usage example:
I use the same pedalboard for electric guitar and acoustic guitar. When I’m using it on acoustic, I need to ignore the amp and cabinet simulators. I use the Switch Box to ignore them
Personal considerations about the M-VAVE Chocolate
Advantages
- It’s cheap;
- Small size;
- Same color of the Mod Dwarf (non Founders edition);
- Has a lot of modes and can communicate with a device with a lot of ways (USB/Bluetooth/MIDI trs). It’s also possible to send (the same MIDI messages) to the USB and Bluetooth at the same time (I haven’t tested with the MIDI trs);
- Advanced mode enable to send more than one MIDI message;
- Expression pedal input;
- The equipment is made of iron (or aluminum, I don’t know) and is apparently well built.
Disadvantages
- Android App isn’t present on the Play Store;
- I felt a lack of material about it. The manual didn’t explain the usage modes and the app didn’t explain them well.
- Despite the number of modes, it misses some customization:
- The seven segments display isn’t configurable, so, isn’t possible to know the current state in the custom modes;
- There are missing footswitches behavior (“modes”) in the advanced custom mode that I expect. E.g.: In the “Mode: Single step (switch between two banks)”, the command is only sent after press and release the footswitch, but I expect that will be sent after press, not only after release;
- Isn’t possible to use the button combination E (A+B) or F (C+D);
- There isn’t any possibility to send custom Sysex (this is for controlling other devices, not specifically the Mod Dwarf).
- I bought thinking to use it to assign more audio plugins and on/off them with the MIDI controller, but there isn’t any feedback about the current state: there isn’t a led for each footswitch.
Then, in my opinion, this equipment is useful, but limited. For a fine control of the Mod Dwarf, the Mod Footswitch will work better because of the compatibility provided by the Control Chain. But the Mod Footswitch is more expensive and bigger than the Chocolate (280 x 87 x 46 mm with 500g vs 212 x 36 x 17mm with 280g).
IMHO, the best of both worlds is a Mod Footswitch Chocolate: An equipment with the size of Chocolate, four leds RGB (one for each footswitch), Control Chain (over USB is a good idea — @falkTX , is it possible?), support for expression pedal. LCD screens or 7-segments display for me aren’t necessary. Bluetooth and battery also aren’t.
Note: I saw some M-VAVE Chocolate labeled with other brands, like “CUVAVE” and “Yuimer”. The “Manufacturer Control” apparently shows that someone already did this. An alternative to the Mod team to instead create another MOD Footswitch is to outsource the device construction, requesting to remove the unnecessary and problematic things like Bluetooth and add RGB leds.
I know that it’s possible to buy the Arduino Shield and myself create what I need, but here in Brazil, the price and the shipping are impediments. And I didn’t spend some time trying to do a reliable “box”.





 !
!
