Ah very nice for us live performers!
Curious where this will lead to!
I pushed the sources here: GitHub - sejerpz/mod-ui at features/performance-view
@jetztgradnet this is the relevant commit: Add performance view to mod-ui · sejerpz/mod-ui@783524d · GitHub
If there is someone with graphics foo I need two icons:
- for the perfomance menù
- for the snapshot item in the list view
Let’s see where this will lead, but sure I’ve a long term plan…
This could be like the phone apps for controlling in ear monitors on stage. Assign controls you want live to big buttons. Love it.
This is a great idea!
Not yet there, you can’t assign arbitrary controls but just choose which plugin goes to that screen.
It’s already useful to modify parameters on plugin basis and also to quick adjust an arbitrary pedalboard plugin parameter
Of course you can also select snapshots.
Just an update on the development: the first version of the mod-ui “modding” is completed.
Now I’ll wait eventually for some MOD feedback and I’ll just polish the patches fix bug etc…
I really like also to find a way to “release” it and let less tech people try it, but I don’t really know how to do.
Sources are here: GitHub - sejerpz/mod-ui at devel
This is what I implemented:
- Port group extension, but in order to be really useful this requires to update plugin ttl files and add group annotations. Who will/can do this?
- Performance view
- Plugin labeling e.g. give your plugin a custom name.
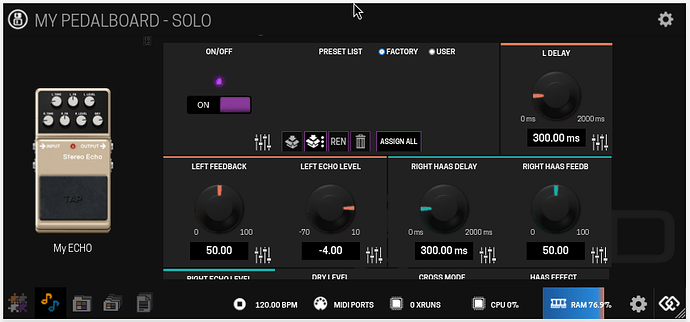
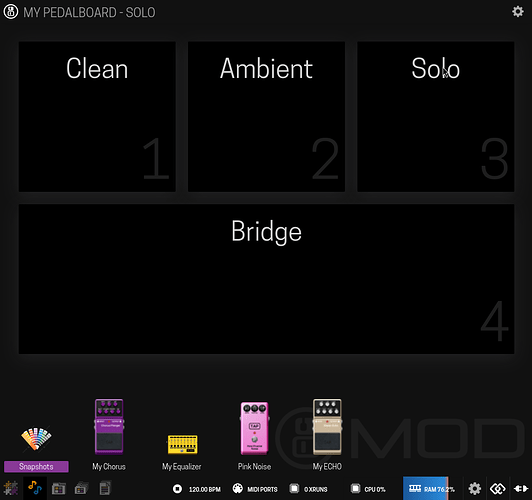
Performance view
The concept is great and I’m planning a version 2 with more functions for now my requirements were:
- the possibility to change plugin parameters like you will do with a physical stombox or the dawrf itself
- the possibility to change an arbitrary plugin parameter e.g. during a soundcheck or rehearsal
- bonus: load a snapshot
Mobile version:
Desktop version:
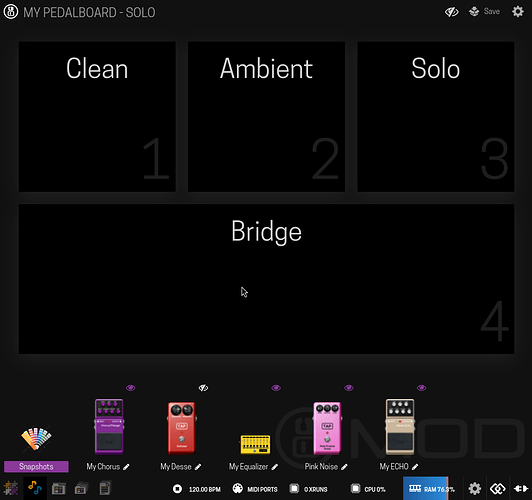
Customizations
Click on the top right gear ![]() to enable design mode where you can:
to enable design mode where you can:
- Choose which pedalboard plugins see in the view

- Change the order with drag & drop
- Change the label of every plugin to differentiate two or more instances of the plugin

- Save the pedalboard
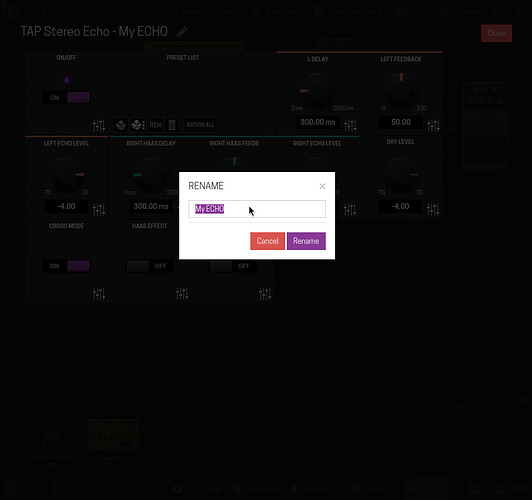
Plugin labeling can also be done in the standard settings dialog on the pedalboard constructor:
That’s all for now, my next step will be in a total different area of my beloved Darf stay tuned ![]()
That’s really impressive, such a serious enhancement for those who use the web-ui while performing.
I was wondering if ther’s a way to estimate the added footprint on Dwarf and, assuming that these improvements will eat some cpu cycle, if we should expect an increased workload also when we go headless.
Thanks a lot for your efforts!
This hardly costs any additional processing. They are mostly cosmetic features with some minor metadata additions.
All of the heavy lifting is done by your web browser.
I confirm, just some more metadata scanning at startup everything else is done on the browser with javascript.
I just tested it on a raspberry pi with a 7" touch display and I love it. I’m not sure I feel brave enough to push it to my dwarf though. Do you have any safety advice for those who would like to install this on a mod device?
Good to hear that it works for you, thanks!
Before going too tecnical: I’ll release all these changes (and some more I’m still developing) in a custom dwarf image when I feel they will be ready for a broad testing
I think that’s too early to push on the dwarf, I still haven’t done myself, but from my understanding it can be done safely because in any case you can reflash the original firmware image without any problem.
These are the step required:
- Compile the native libmod_utils.so present in the mod-ui/utils with the dwarf toolchain (the same you will use for developing a plugin)
- deploy the .so file in the same location of the previous one: /usr/lib/python3.4/site-packages/modtools/libmod_utils.so
- run the mod-deploy.sh script
if you want you can take a backup of the original files (see the script for details) present on these folders:
- /usr/lib/python3.4/site-packages/modtools/
- /usr/lib/python3.4/site-packages/mod/
- /usr/share/mod/html/
I still don’t know exactly how to do step 1. But for the Dwarf I suppose the step 3 should be done from a mod-ui based on branch hotfix-1.13 for firmware 1.13 or plugin-store…
You can’t mix the new mod-ui with an old libmod_utils, it won’t work.
Read here: Open Images - MOD Wiki
“Compatible binaries can be built using mod-plugin-builder”
So you have to setup an environment like the one used for building a plugin and from there compile the libmod_utils.so
In order to compile it’s enough to run
“make -C utils”
from the mod-ui repos.
You Devs could create beta “images” with these implementations so us normal humans can test these awesome mods.
Yes, I created my first one yesterday, I’ll do a public “alpha” one sooner.
To be extremely clear I’m not a mod developer, just a user who knows how to program.
So my image will be a “custom” one and not an official beta.
Yes… I understand. I’m trying to get my feet wet too… I’ve already made a theremin and now I’m putting together my MIDI controller… with an ESP32… but I’m far from understanding the programming architecture required to develop this type of application! I’ll definitely try it out when you make it available. I’m eagerly awaiting it!
Great work man!!! I’m planning to do something similar in a project I’m next to build, based on mod-desktop on a pc based pedalboard,by using open osc , but i must admit,your project is great!!! BRAVO!!!
I look forward to videos and photos of your theremin! I got an OpenTheremin a few years ago, but haven’t had a chance to start hacking it yet.
Hi, would it be possible to access directly this performance view with a web browser??
I’m thinking about mobile phone or tablets where there is no need to go to the pedalboard build view first.(it takes long time and also more cpu usage)
I agree with your proposal, I was thinking about even it when I was developing the view, I just didn’t implement it at the time because of my lack of knoledge with the codebase and some UX concern I had in mind: e.g. is really useful to have this view as the first one?
What’s the opinion of the community?
When the Dwarf should display the performance view as the first page instead of the constructor?
- when used from a smartphone
- when used from a tablet
- when used from a device with <= 1024 x 768 resolution
- when used from a device with <= 1280 x 800 resolution
- when used from a device with a touchscreen
0 voters


